How To Clean Your Fake Plants
How To Clean Your Fake Plants
By Oskar
7th Oct 2025
While faux plants are a lot easier to maintain than live house plants, they still need a little bit of care from time to time! We’ll go through some top tips to help you keep them looking their best.
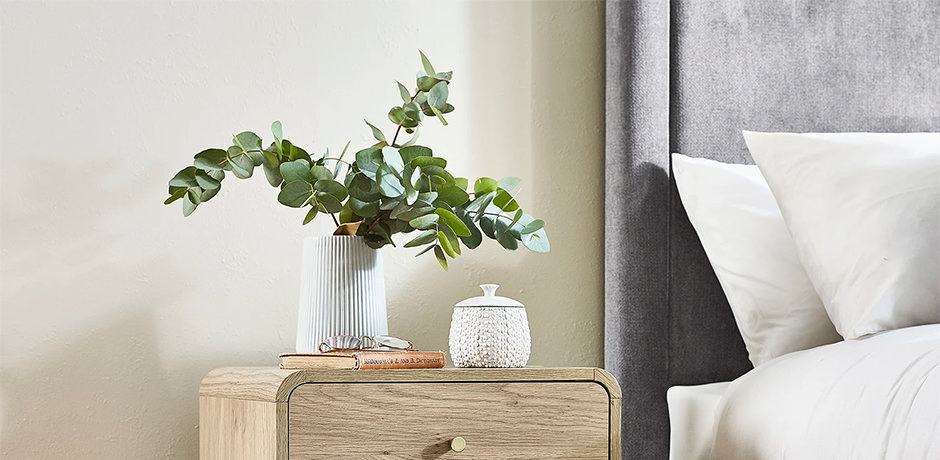
If you love having some greenery in your home but don’t want the hassle of looking after real plants, then fake plants are a great option. No watering and no trimming required!
But that doesn’t mean you can take a completely hands-off approach. If your faux plants are starting to gather some dust and looking a little worse for wear, then it’s time to kickstart a new cleaning regime.
Methods For Cleaning Your Faux Plants
Your approach to cleaning your faux plants will be different depending on what type you have, as some methods aren’t suitable for certain materials (or particularly fragile plants).
We’ll go through several different methods, so no matter what type of faux plant(s) you have, you can get them dust and dirt-free in no time!
The Quick Wash Method - Suitable For Sturdy, Non-Silk Plants
You’ll need:
- Plastic bag
- Running water (shower/tap/hose depending on plant size)
- Sunlight/towel/hair dryer (for drying, sunlight preferable)
- Step 1 - Put plastic bag around the plant's base
- Step 2 - Position the plant for washing
- Step 3 - Hose down the plant
- Step 4 - Dry the plant
Step 1
Take a plastic bag that is large enough to cover your plant’s base, and secure it around the pot. As the base of a faux plant often contains more porous material, it can be more mould-prone than the rest of the plant. It’s best to clean it with some less watery methods, which we’ll get into later.
Step 2
Before you actually start washing your plant, make sure it’s in a suitable location. If you’re using your shower for water, then just put your plant inside it (and away from the doors, to reduce splashback leaving the shower!). Otherwise, either outside in your garden or inside a sink basin works. Turn it on its side to reduce water flowing down the plant and towards the pot.
Step 3
Now for the fun bit: hose down that plant! You should aim to clean off any visible dirt, and focus the water flow on the uncovered part of the plant. Even with the plastic bag in place, it’s best to avoid direct water flow on the base.
Step 4
Once it’s clean, it’s time to dry your plant. Ideally, leaving your plant in direct sunlight to dry is the best method here, making sure you leave it for long enough to completely dry. But if that’s not possible, you can also towel dry your plant, or use a hair dryer on a cool setting. The important thing is leaving the plant 100% dry to discourage any mould growth.
The Soapy Bath Method - Suitable For Small But Sturdy Non-Silk Plants
You’ll need:
- Water
- Small amount of washing up liquid
- Tub or bucket
- Sunlight/towel/hair dryer (for drying)
- Step 1 - Fill a tub with water
- Step 2 - Add in washing up liquid
- Step 3 - Put plastic bag around the plant's base
- Step 4 - Dip the plant into the tub and swish
- Step 5 - Remove the plant and rinse
- Step 6 - Dry the plant
Step 1
First, you’ll need a tub or bucket that is large enough to dip the non-pot part of your faux plant into. Fill the tub with warm water.
Step 2
Add some washing up liquid to the water in the tub. You don’t need a lot, but stir the water a little and make sure it’s a bit soapy.
Step 3
Take your plant, and wrap the plastic bag around the base, securing it tightly. As with the previous method, this will act as a layer of protection for the plant pot, reducing the chance of water seeping into the more porous material and causing mould issues later on.
Step 4
Holding the base, lower the uncovered part of the plant into the soapy water, and swish it about. Aim to remove all visible dust and dirt, and, if you’re doing a particularly deep clean, consider switching out the water for a second round.
Step 5
Once the plant is looking cleaner, take it out of the tub and rinse it off, either in the sink, the shower, or outside with the hose. Once again, take care to only direct the water at the uncovered part of the plant.
Step 6
When you can no longer see any soap bubbles, it’s time to dry the plant. Either leave it in direct sunlight to sun dry it, or manually dry it with a towel or hair dryer (on a cool setting).
The Compressed Air Method - Suitable For Sturdy Plants Made From Any Material
You’ll need:
- Can of compressed air
- Well-ventilated room or outdoor space
- Step 1 - Position the plant
- Step 2 - Aim can of compressed air
- Step 3 - Spray compressed air
Step 1
Thinking about where you’re going to use this method is incredibly important, as all the dust from your plant will go into the air. Choose a well-ventilated room or an outdoor space, and place your plant on a sturdy surface.
Step 2
Even if your plant is quite sturdy, it may have some more delicate or weaker parts. Therefore, when you aim the can of compressed air, make sure you’re not too close to the plant, as the force might be too much for it. Generally, keeping the can 30 cm (about 12 inches) away from the plant is a good guideline.
Step 3
Move between each part of the plant, using short bursts of the compressed air rather than one long spray. Shorter bursts make it easier and more efficient to target specific areas, and you can quickly adjust your distance if it looks like the compressed air is too strong for your plant. Continue until there’s no dust left!
The Hair Dryer Method - Suitable For Sturdy Plants Made From Any Material
You’ll need:
- Hair dryer
- Well-ventilated room or outdoor space
- Step 1 - Position the plant
- Step 2 - Aim the hair dryer and set it to cool
- Step 3 - Use the hair dryer on the plant
Step 1
Like with the compressed air method, using a hair dryer will cause any dust on your plant to fly into the air. Therefore, pick a well ventilated room, or set up an outdoor space, and position your plant on a steady surface.
Step 2
You’ll want to make sure you’re holding the hair dryer away from the plant; once again, about 30 cm or 12 inches is a good general guideline. Additionally, make sure your hair dryer is set to its ‘cool’ setting, to avoid any potential heat damage to your plant.
Step 3
Now, it’s time to blow dry your fake plant! Just as with the compressed air method, short bursts are best for a slightly more targeted approach. They let you instantly adjust if you’ve come in too close, whereas with a longer burst, you could potentially cause damage to your plant before realising. Continue with the short bursts until there’s no dust left on the plant.
The Feather Duster Method - Suitable For Any Fake Plant That Only Needs Minimal Cleaning
You’ll need:
- Feather duster
- Open window/ventilation
- Step 1 - Prepare the space
- Step 2 - Start dusting the plant
Step 1
While your plant might not be too dusty, you’ll still want to crack open a window or otherwise ventilate your space before you start dusting.
Step 2
All you need to do for this method is dust each part of the plant with your feather duster. Be especially gentle with any fragile or brittle parts of the plant, and continue until you can’t see any more dust.
The Heavy-Duty Wipe Down Method - Suitable For Non-Silk Plants That Need Intense Cleaning
You’ll need:
- Microfibre cloth
- Mild household surface cleaner
- Sunlight/towel/hair dryer (for drying)
- Step 1 - Check the manufacturer’s instructions for your plant (if possible) and the surface cleaner
- Step 2 - Do a small spot check
- Step 3 - Spray and wipe the plant
- Step 4 - Dry the plant
Step 1
When you’re using chemicals on your faux plant, even mild ones, it’s always best to double check any instructions. That includes both the manufacturer’s instructions for your plant, if you have them, and the instructions for the surface cleaner. For example, if the cleaner’s instructions recommend not using it on fabric, and your plant has polyester fabric leaves, then this method wouldn’t be the best choice.
Step 2
If the instructions don’t suggest any issues, then you’ll want to do a quick spot check. Spray a small amount of the household cleaner on a relatively hidden part of the plant, such as the underside of a leaf. Wait a few moments, and then wipe it away with the microfibre cloth. If there is any discolouration or damage, then you’ll need to stop using this method.
Step 3
But if your plant looks okay after the spot check, you can continue. Spray each part of the plant and then wipe it with the microfibre cloth, continuing until the whole plant is clean. Plus, this is a great method to clean your faux plant’s pot if you used an earlier method for the rest of your plant.
Step 4
While your plant may have naturally air dried throughout the time it took to clean each part of it, it’s best to double check that it’s completely dry. Leave it in direct sunlight for a few hours for the best results, or use a towel or a hairdryer on a cool setting for the manual approach.
The Paintbrush Method - Suitable For All Faux Plants, Especially If They’re Delicate Or Fragile
You’ll need:
- Paintbrush
- Open window/ventilation
- Step 1 - Position the plant
- Step 2 - Go over each part with the paintbrush
Step 1
You’ll want to place your plant on a sturdy surface, near an open window or other ventilation if possible. Also, if you have a particularly intricate or large plant, you may want to make sure you can sit in a comfy position; this method can take a little bit longer than the other options.
Step 2
Using the paintbrush, go over each small detail of your plant, carefully brushing away the dust. By using a small paintbrush, you can be so much more accurate than with some other methods, and reach awkward nooks and crannies in your plant’s design. Continue until your plant is visibly dust-free!
Checking Your Fake Plant’s Materials
But before you try out any of these methods, double check your fake plants to see what they’re made out of. The same cleaning method can leave sturdy plastic plants sparkling clean, and polyester plants stained and damaged.
Be particularly careful with silk flowers, as any vigorous cleaning methods or harsh chemicals can damage the delicate fabric, as well as heat (such as from a hair dryer). Plus, wet cleaning methods can sometimes cause the colours in a silk faux plant to run, so stick to the dry cleaning methods to err on the side of caution!
Preventing Major Build-Up Before It Happens
While these methods should help out with cleaning your faux house plants, there are also some steps you can take to reduce the need for drastic deep cleans.
A weekly once-over with a feather duster is a quick task that can help you to keep on top of that dust build-up, for example. A great rule of thumb is just to get out the feather duster if you can visually see dust build-up on your fake plants, and then adapt your cleaning schedule accordingly.
If you’re putting your faux plants in storage for a while, then make sure you cover them up to reduce the chances of dust building up. It’ll save you a lot of time when you bring them out of storage and want to display them again.
While it won’t actively prevent dust build-up, you should also regularly rotate your faux house plants, especially if they’re in direct sunlight. This can reduce the impact of sun exposure and keep fading even, and also gives you a chance to dust them down as well.
It’s Time To Make Your Fake Plants Shine!
No matter what sort of faux plants you have, you’ll hopefully now be able to tackle that dust and dirt. But if it’s time for a refresh, or if you want to add to your collection, then you can take a look through our range of faux plants.
We also have some helpful ideas for where to place your fake plants in your home, in case you want to try out a new decor style!

Oskar
Oskar is an expert home interiors blogger who loves sharing practical DIY tips and home inspiration. Alongside style advice, he also writes expert how-to guides with easy step-by-step instructions to help you update your space with confidence.
